I wrote this article because a client asked me for some shoulder strengthening postures as he was following along with these 11 Yoga Poses for Shoulder Pain, which consists mostly of shoulder stretches and shoulder openers. It contains only a couple of shoulder strengthening postures, so I thought it would be helpful to write a whole article with our recommended yoga postures for strengthening the shoulders.
You may be having shoulder pain due to either tightness in the shoulders, or weakness in the shoulders, or perhaps a combination of both. Whatever you are experiencing, we invite you to follow along with both these shoulder strengthening exercises and the shoulder openers in our other article, and find the postures that work best for you and your body at this time. This will be different for everyone because everyone's shoulders are a little different in terms of strength or weakness, tight or open. Listen to your body and remember to breathe deeply as you follow the instructions and postures.
This article describes my favorite Yoga poses that will help to build strength in your shoulders. After doing these strength building postures, it will be helpful to do the shoulder stretches afterwards.
I recommend doing this sequence using the breathing as mentioned below, then progressing to holding each pose for a little longer, up to twice the number of breaths mentioned below.
Remember to listen to your body and breathe slowly and deeply. If any pose doesn't feel good or if you are experiencing discomfort or pain, please release out of the pose and leave a comment in the comments section below and I'll be sure to respond.
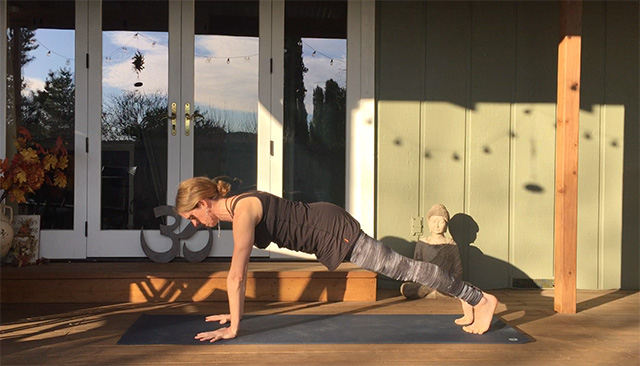
Phalakasana (High Plank)
Come onto your hands and knees and line up your shoulders over your wrists, hips over your knees. Spread your fingers wide, pressing all 10 fingers firmly into the mat. Keep the gaze down at the mat so the neck is long and in line with the spine. Draw the shoulders away from the ears as you push the floor away, straightening the arms. Keep a slight softness in the elbows so they do not hyperextend. Keeping the palms face down, externally rotate the shoulders so that the crease of the inner elbow is facing forwards. Draw the belly up towards the spine and draw the front ribs towards each other, engaging the core.
Then step the right foot back, staying on the ball of the right foot, with the leg straight. Press firmly into the hands with strong core, and step the left foot back, staying on the balls of both feet, and the core engaged. Keep the shoulders away from the ears as you keep pressing the palms down, and externally rotating the shoulders, and find broaden across the upper back and shoulders. Breathe deeply for 5 long slow breaths, then release the knees to the mat, and rest in Child's Pose for 3 breaths. Repeat 3 times if that's available for your body. Modification: place the knees down on the mat instead of having the legs straight and extended.
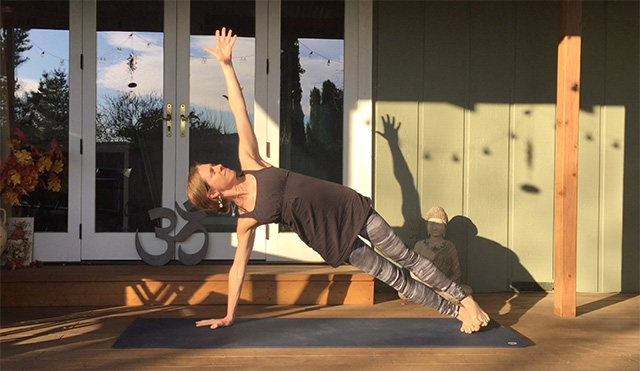
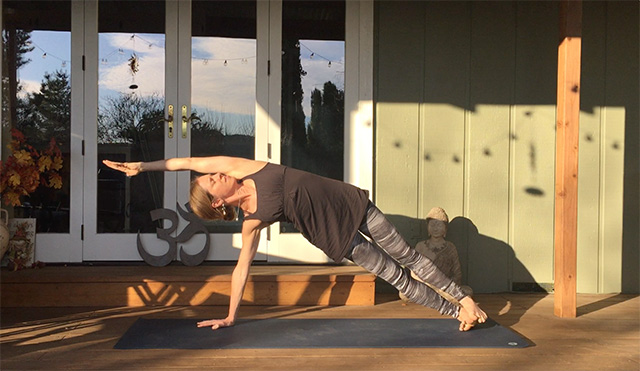
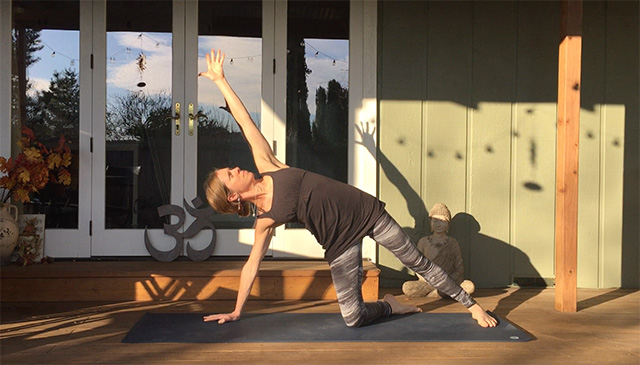
Vasisthasana (Side Plank)
From High Plank pose, lower the right knee to the mat, shift the weight onto the right hand, extend the left arm towards the sky as you stack the hips and stack the shoulders. Press the left foot firmly into the mat. Keep the right shoulder directly over the wrist and push the floor away from you, drawing the shoulders away from the ears. Either stay here and breathe for 5 long slow deep breaths, or straighten the right leg and roll onto the outer right foot, either stacking the feet or placing the left foot in front of the right knee as a kick stand for support. You choose the variation that works for you. Hold and breathe for 5 long slow deep breaths, lifting the hips up high, keeping the top shoulder open and the shoulders stacked. Moving back into plank position and then switching to the other side, doing Side Plank, Vasisthasana, on the left side. Notice a difference in sides, as one shoulder may be stronger or weaker than the other. Just notice without judgement.
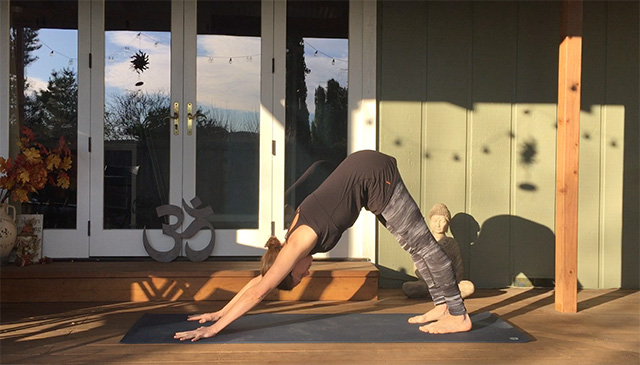
Adho Mukha Svanasana (Downward Facing Dog)
Come back onto hands and knees, tuck the toes under, lift the hips up high, into Downward Facing Dog, an upside down V shape. Spread the fingers wide, pressing into all 10 fingers, particularly the thumb and first finger. Place your hands a little wider than shoulder width, and feet about hip width. Press the heels to the mat as you lift the kneecaps to engage the quadriceps and press the top of the thighs back. Draw the belly up towards the spine to engage the core, press the sit bones up towards the sky, push the floor away with the palms and draw the heart towards the thighs. Keep the head and ears in line with the arms. Create space in the upper back and strength in the shoulders and upper back by rotating the triceps towards each other, externally rotating the shoulders as you draw the shoulders away from the ears, and continue pushing the floor away from you. Hold and breathe for 5 long slow deep breaths.
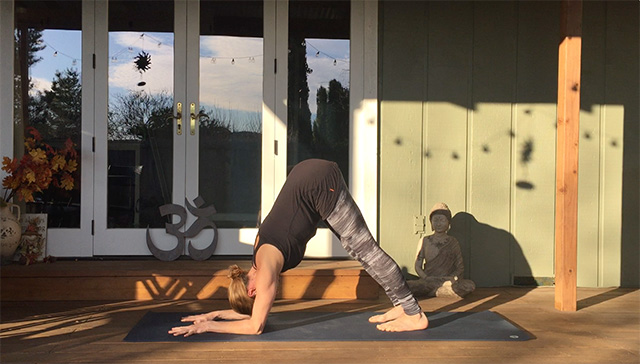
Makarasana (Dolphin)
From Downward Facing Dog, lower onto your forearms, with the forearms parallel to one another and the palms face down. Press the forearms and the palms down into the mat as you press the shoulders away from the ears, creating space around the shoulders. Begin to walk the feet a little closer to the elbows. Feel the strength of the shoulders and breathe into the shoulders. Keep drawing the sit bones up high, legs engaged and the thighs towards the chest. Allow the head and neck to relax so the crown of the head is towards the mat. Hold and breathe for 5 long deep breaths. Modification: Place the knees onto the mat, keeping the sholders and forearms in Dolphin. If you find your hands are moving towards each other and your elbows are sliding outwards, place a block in between the hands so the thumbs and first finger wrap around the edge of the block. Keep the elbows and wrists in line.
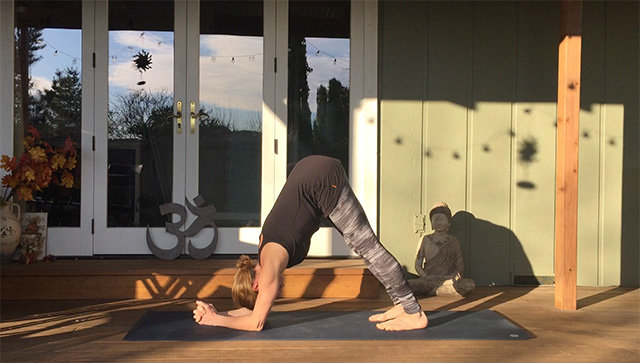
Makarasana (Dolphin Variation)
Another variation of Dolphin to strengthen the shoulders is with your hands together and interlace your fingers. Continue to keep the elbows under the shoulders and press the forearms into the mat, drawing the shoulders away from the ears. Allow the head and neck to relax so the crown of the head is towards the mat.
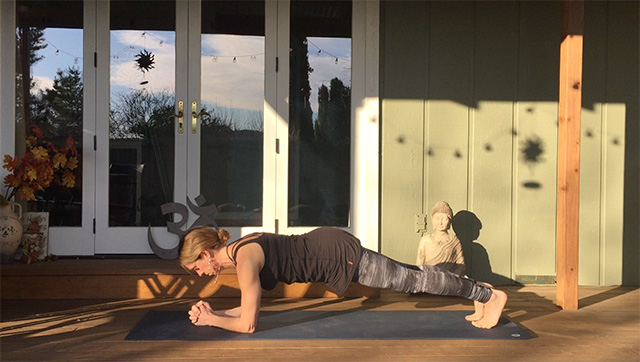
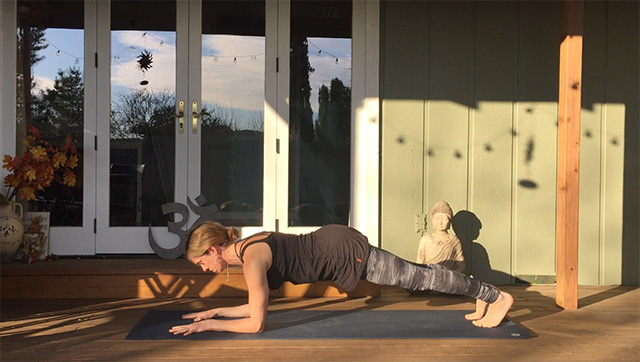
Phalakasana (Forearm Plank)
From Dolphin, walk the feet back towards the back of the mat, staying on your forearms. You can have your fingers interlaced or palms down and forearms parallel. Do the version that works best for your shoulders at this time, or try both versions. Keep your core and legs engaged, keeping your hips in line with your shoulders. Modification: Place your knees down to the mat if it's too much with the legs straight and extended.
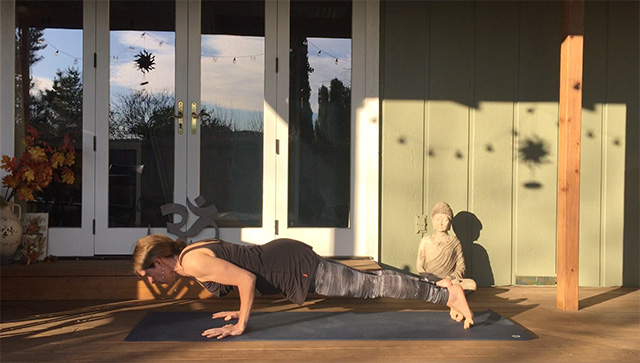
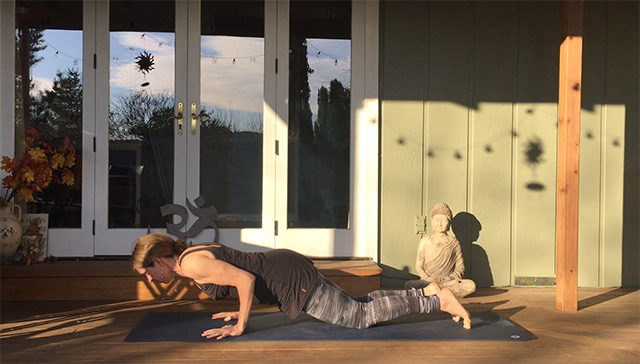
Chaturanga Dandasana
From Forearm Plank, rest on your hands and knees for a few breaths. Then come back into High Plank as described in the first pose above with your shoulders over your wrists. Inhale as you shift forward so your shoulers are over your fingertips, then exhale as you bend the elbows, hugging them into the side of your body, and lower halfway to the floor, so your shoulders are in line with your elbows, no lower than the elbows. Keep the gaze slightly in front, not straight down. Keep the core and legs strong. Modification: lower your knees to the mat before lowering halfway down. Hold and breathe for 5 slow deep breaths.
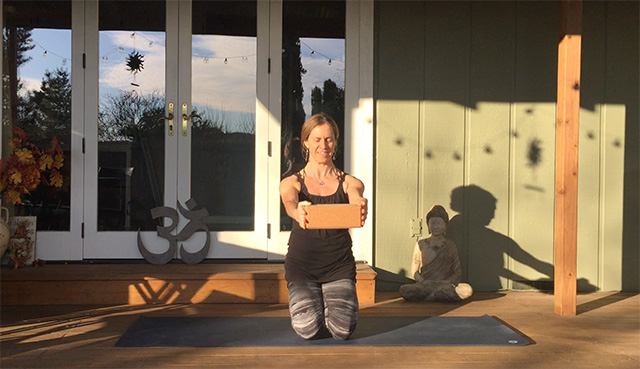
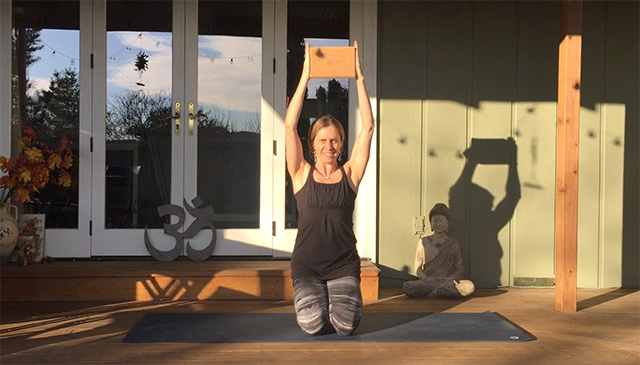
Urdhva Hastasana (Arms Overhead) with block
Stand in a strong Tadasana posture, or you can do this in a supported seated posture if you prefer, making sure to keep your spine straight and core engaged. Place a block in between your palms, then straighten your arms out in front of you. Press the block with your palms. Keep your shoulders away from your ears and slightly externally rotate the shoulders as you draw the triceps in towards each other and the crease of the elbow upwards. Keeping your spine straight and core engaged, slowly begin to raise your arms up overhead. The arms may not go directly overhead if your shoulders are tight.
Notice if your low back arches, and try to keep the core engaged by drawing the belly back towards the spine and pressing the low back straight. Doing this with your back against the wall is a nice modification as you can keep your back bottom ribs pressing into the wall. Keep pressing the block with your palms, arms straight or as straight as you can, external rotation in the shoulders, and breathe.
This is a great strengtheing exercise for your shoulders, as well as helping to open the shoulders whilst keeping core, spine and shoulders strong and aligned. Breathe deeply for 10 long slow deep breaths, then slowly lower the arms, rest for 10 breaths, then repeat. You can repeat this 5 times to start with, and build up to holding for longer each time.
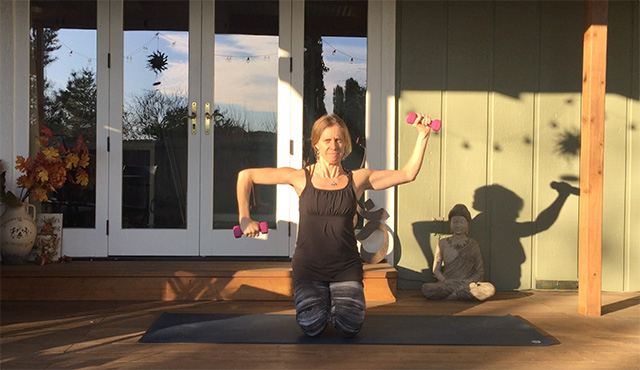
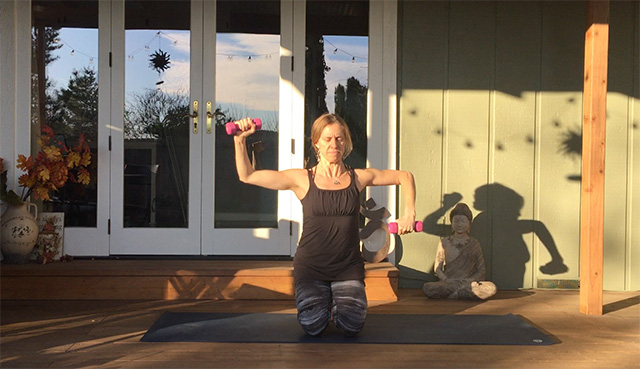
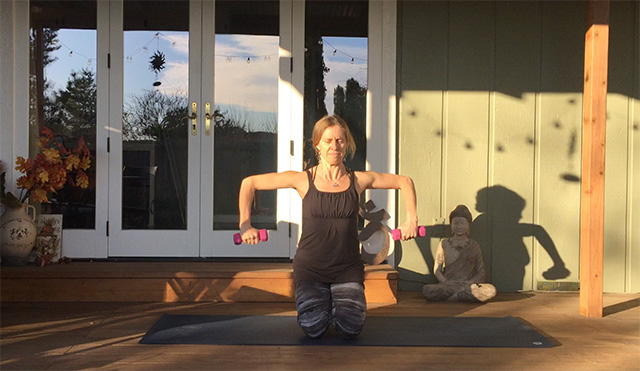
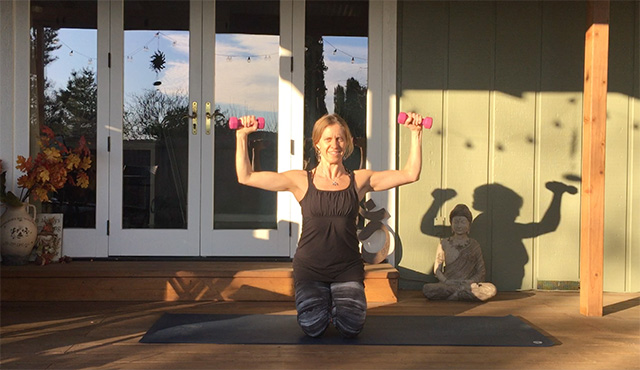
Internal and External Rotation with Dumbbells
Stand in a strong Tadasana posture, or you can do this in a supported seated posture if you prefer, making sure to keep your spine straight and core engaged. Take a hold of a 2lb or 3lb dumbbell in each hand and place the dumbbells at heart center, pressing the dumbbells towards each other. Now bring your arms out into cactus arms, with the elbows in line with the shoulders, shoulders away from the ears, and wrists directly above the elbows, palms facing forward as in the first image below.
Inhale, press the right hand and dumbell downwards until the hand and dumbbell is vertically below the elbow, keeping the elbow at shoulder height, externally rotating the shoulder. Exhale, draw the hand and dumbbell back up to starting position, interally rotating the shoulder. Inhale, repeat the same movement with the left arm, keeping the left elbow in line with the shoulder, and exhale to draw it back up to starting position. Inhale, press both hands and dumbbells down, pressing the palms back at the bottom, exhale hold here for a static peak contraction of the rotator cuff muscles, inhale hold, and exhale release and extend the arms back up to starting position. Then draw then hands and dumbbells to heart center, anjali mudra in front of your heart. Repeat this sequence 2-3 times, using this 4-breath sequence throughout the movement.
This exercise is a sequence from Iron Yoga. Normally this is done whilst holding a power yoga posture such as Vrksasana (Tree pose) or Garudasana (Eagle pose). In this case, since we are focusing on shoulder strength only, I recommend doing this either in Tadasana (mountain pose), Virasana (kneeling pose) or Toe Sit (on knees with toes tucked under and sitting on the heels, as shown in the images below). If you'd like to learn more about Iron Yoga, power yoga postures using light dumbbells for upper body weight training, you can learn more on the Iron Yoga website.

Balasana (Childs Pose)
After this sequence, take a few breaths to rest in Child's Pose. Come onto your hands and knees, place the knees to the sides of the mat and the big toes together, sink the hips back into the heels and place the forehead on the mat for Child's Pose. Relax the arms back alongside the thighs to relax the shoulders. Hold and breathe for 5 long deep breaths.
Savasana
It's important to always finish any yoga sequence with our final resting pose, Savasana. You can either come straight into Savasana now, or if you would like to stretch and open your shoulders after working them in this strength building sequence, follow the postures in our Article with Yoga Postures for Tight Shoulders.
If you're moving straight into Savasana, lie down on your back, close your eyes, let the whole body be relaxed and still, arms a little away from the body, with the palms facing up. Bring your internal gaze to your third eye chakra in between your eyebrows and visualize a bright white light at that space, area of intuition and wisdom. Remain here in Savasana for a few minutes or as long as you wish, before slowly and gently deepening your breath, finding some movement back in your body, rolling onto your right side then slowly coming into a seated position. Bring your palms together at your heart center. Namaste.
Feel free to leave any comment and questions in the comments section below and share with your friends on social media if you found this article helpful.
Author: Sally Mitchell, founder of Body Flows Yoga Retreats and RYT 200 Yoga Teacher leads yoga retreats in California, Colorado, Arizona, Oregon, Hawaii, Mexico and Costa Rica. Living in beautiful Sonoma, California, after 15 years in NYC and San Francisco, her approach as a leader and teacher is holistic, balanced and grounded. She enjoys practicing and studying Yoga and Buddhism, hiking and trail running in nature, traveling, writing and inspiring others to live a more spiritual and meaningful life.

Are you practicing yoga correctly? Are you making mistakes that could cause injury?
Read Article
Do you experience low back pain? Perhaps if you spend a lot of time sitting down or driving?
Read Article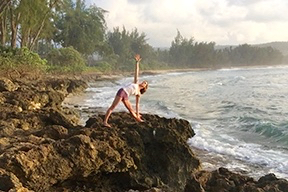
When we are correctly aligned in Triangle Pose, we are creating three Triangles with our body.
Read ArticleThe Body Flows website contains information intended to assist you in improving your health and overall well being, however, the information presented herein is offered for informational and educational purposes only and is not a substitute for the professional judgment of a medical professional.
Body Flows makes no warranty or representation whatsoever regarding the services or products provided through or in connection with the website. Please use your own discretion when performing any postures. Work at your own level and explore your own limits.
The reader and viewer of the information presented by this site assumes all risks when using the information provided herein. This site's operators, authors, owners, and affiliates disclaim any and all liability from the information provided herein. Any medical, financial, legal, health, psychological or other information provided on this site is not intended as a replacement for professional consultations with qualified practitioners. If this site provides health-related or medical information, no such information provided by this site is intended to treat or cure any disease or to offer any specific diagnosis to any individual as we do not give medical advice, nor do we provide medical or diagnostic services.
We recommend that you seek professional medical advice before performing any techniques, poses, postures or routines presented on our site. We thank you for visiting us and want the best for you, your practice and your health.